About Me

My photo
Little Mouse started to wreck the kitchen more often since 2012 through learning via internet, social networks. The rodent used to cook/bake only occasionally but is glad to show improvement :) This blog is just to capture her kitchen journey so that over the years, rodent knows if she has made advancements. Have a blessed day~~

Translate 翻译

Tuesday 29 July 2014

CHERRY LIQUOR


It's almost end of cherry season. I went to supermarket hoping for cherry discounts, and yes there was! The fruits were ripe in darker shades and not as pretty, but hey, it was better for me! Yeah! (^O^)

I saved my quite expensive liquor for good use, so now was the time! Take note that cherry juice can cause stains on counter top and clothes, so please be careful.

The whole cherry should be used (yes, even the pit!), except for the stem. By rights, the juicy stone-fruit should be smashed, but I wanted to keep them in good shape so that they could be used for baking or ice cream or other deserts. I would just need to soak slightly longer than the one month infusion period.

You will need:
Washed and completely air dry cherries
Dry, clean glass jar
Liquor (vodka, rum, brandy....whatever you prefer)

1. Remove stems of cherries. Using a clean chopstick, push out pit from the bottom of cherry, straight into the jar. (If you wish to smash the fruit, make sure the skin goes into the jar too)

2. Fill the jar with liquor, completely covering the cherries.
3. Seal jar tightly.
4. Place in a cool, dry place for about one month. Swirl the jar occasionally.
5. Drain out the liquor into another dry and clean screw-cap jar.
6. Reserve cherries in fridge for future use.

After two weeks, the liquor has changed from tea colour to red. It now looks like red wine. Cherry taste is subtle.

Tuesday 22 July 2014

PUMPKIN THICK SOUP

My mother in law bought a pumpkin (actually two but now left one) for quite a while. She loves pumpkin, but the rest of us are not so keen. She reminisced the thick, creamy pumpkin she had when she visited Vietnam many years ago, and asked if I could make it. That's was a challenge because I had never tasted thick pumpkin soup before. So I looked up the internet for some ideas, and came up with a I-think-may-turn-out-alright version. To my surprise, the soup was well received by family and a neighbour.


PUMPKIN THICK SOUP
Ingredients
1 tsp cumin (aniseed)
2 tbsp butter
1 medium onion, diced
2 potatoes, cubed
1 whole pumpkin, cubed
3 cups of water
1 can button mushroom, quartered
1/3 cube Knorr chicken essence
salt and pepper to taste

Garnish
Whipping cream or milk or plain yogurt
Black pepper
took me quite a while to finish cutting up this much pumpkin! phew!
1. When preparing potatoes, soak cubes in water for a while and drain.
2. In a small pot, using very low heat, fry cumin till fragrant. It takes about a minute. Then grind finely and set aside.

3. In a medium sized pot, with low-medium heat, melt butter and saute diced onion till translucent. (Cover the pot and let simmer for a while to quicken the pace)
4. Add in ground cumin and fry for a minute more.
5. Add in diced potatoes. Continue stirring and increase heat to medium. Keep stirring for about 8 minutes.
6. Add in cubed pumpkin. Stir fry for about 10 minutes.
7. Add water and allow to boil, occasionally stirring the pot.
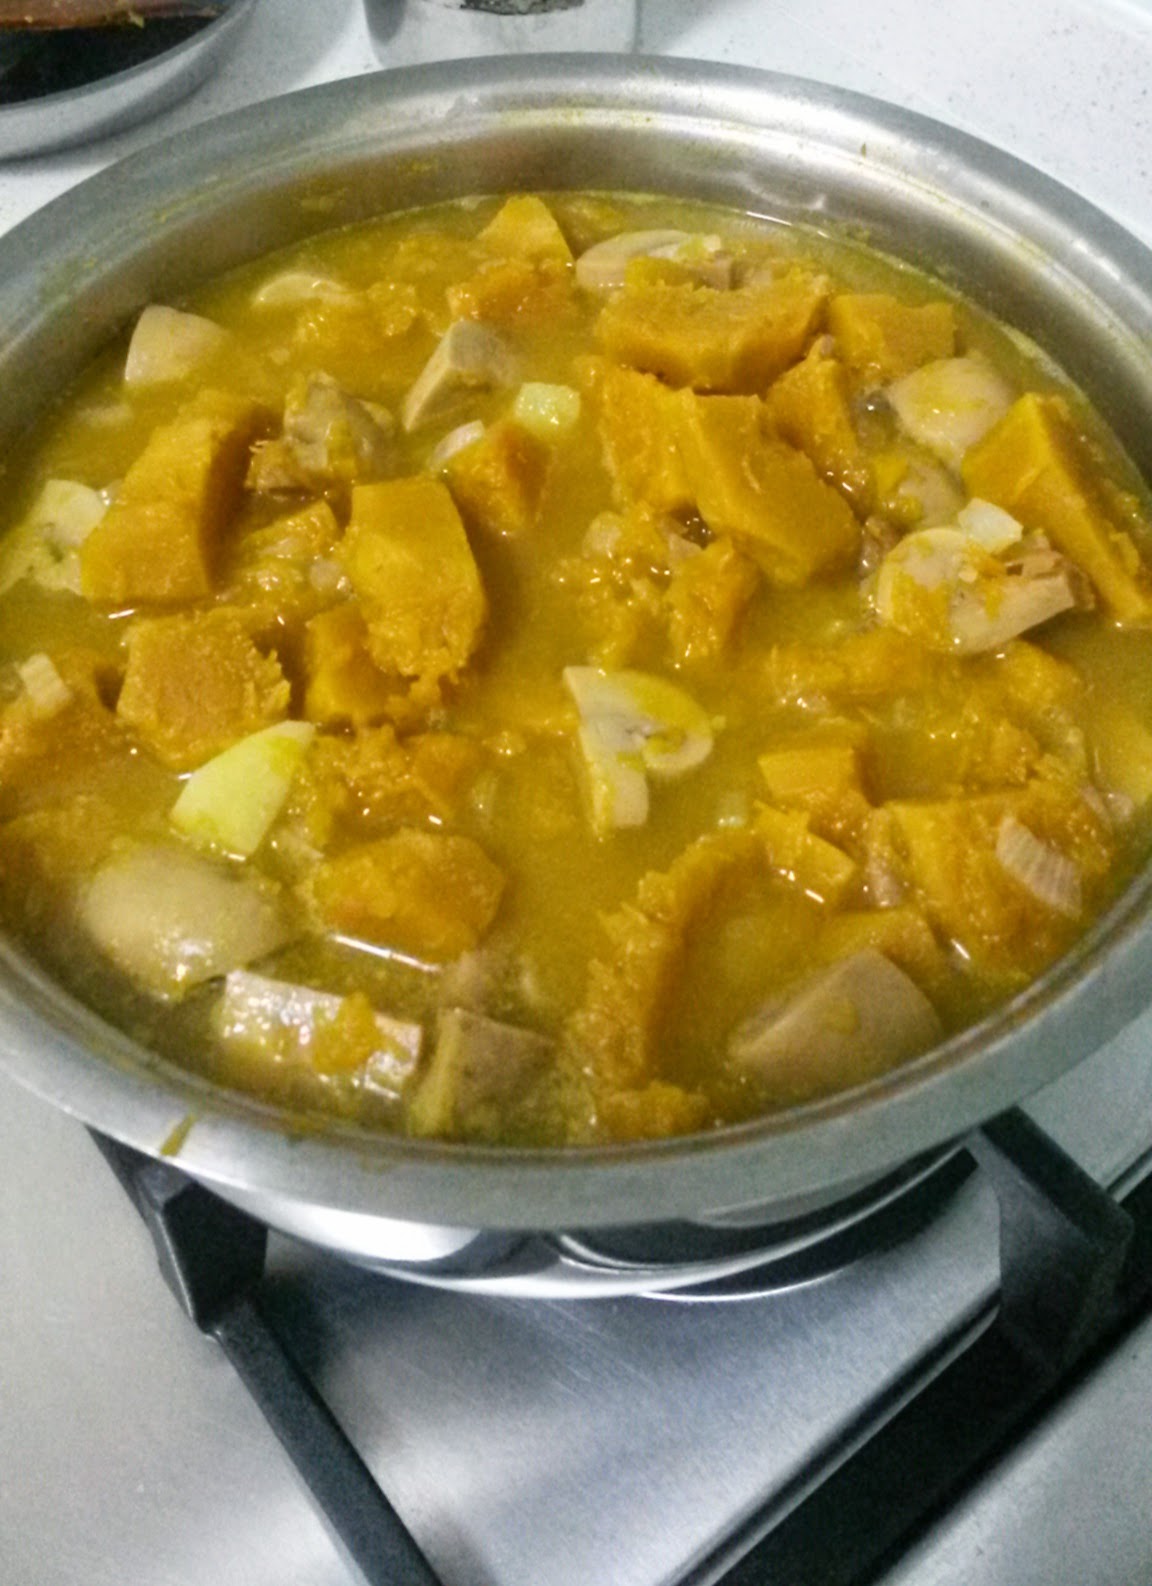
8. Add in mushrooms and continue to boil lightly until the pumpkin and potatoes are soft.

pumpkin and potatoes are now soft!
9. Add in chicken cube, salt and pepper to taste.
10. Blend the soup till smooth.
I used a hand held blender, but a normal blender can be used too


11. Serve warm with whipping cream and a dash of black pepper.

VERDICT
You may opt out the potatoes if you do not like the soup too thick, or you may add only one potato. 
My husband and I liked the cumin which really enhanced the flavour, while I sensed my mother in law wished it was not added in.


Monday 7 July 2014

DOGGIE BUN

I recall seeing a photo on the internet on how to shape a bread dough into a doggie head. Base on what I can remember, ta-dah!

I am not following any bread recipe, so you may use your own. I made my own concoction to derive the bread texture that I like: slightly hard on the outside, soft on the inside.

My Own Bread Dough
200g bread flour
50g plain flour
30g sugar
20g milk powder
3g salt
3g instant yeast
2 tbsp evaporated milk
about 3/4 cup water (may not use all, please adjust to make into dough)
2 tbsp oil (melted butter is better, but I'm lazy)

more plain flour for dusting purposes
Raisins for eyes and noses

Egg Wash
1 egg + 1 tbsp water, well beaten

Method
1. Mix all dry ingredients well.
2. Add in evaporated milk and slowly add in water. Use your hand to knead and adjust water until the dough just comes together.
3. On a lightly dusted surface, place dough onto top and knead for a while. Add in oil.
4. Keep kneading until the dough is elastic and passes the window pane test.
5. Cover and let proof for about one hour until the dough doubles.
6. Punch out air and roll into a log.
7. Cut into 8 - 9 pieces. Roll them into a round balls.
8. Starting from the first ball, lightly flatten the dough into a oval shape. 

 9. Slice out the ears and shape the face.

Seal the face properly, otherwise it will open up again during proofing


10. Let the dough proof again for about 30 min or until double in size.
11. Arrange the eyes and noses, egg wash.

12. Bake in a preheated oven of 180C for about 20 min.


Slice under the chin and let the dog have a bone!
hotdog will look more like a bone, haaaa

Thursday 3 July 2014

HOMEMADE MINT EXTRACT

I have a mint plant along our corridor, and since I am going to make my own vanilla extract, I think I may as well make a mint extract.

Ingredients are pretty simple. Mint leaves and dark rum. Of course you may use other liquor such as vodka or rum or brandy. It is up to the baker.


1. Prepare a very clean glass bottle or jar.
2. A handful of mint leaves (peppermint will be a better choice, but I'll make do with what I have)
3. Dark rum enough to cover the leaves.
4. Let it seep for a month and taste to see if the flavour is alright. You may seep longer for stronger taste.

Wash the mint leaves

Pat dry. Leave to air to ensure there is no more water


Crush the leaves, place in clean and dry glass container

Pour liquor to completely cover the leaves. Seal tightly. Keep in a cool,  dry place for 1 month