About Me

My photo
Little Mouse started to wreck the kitchen more often since 2012 through learning via internet, social networks. The rodent used to cook/bake only occasionally but is glad to show improvement :) This blog is just to capture her kitchen journey so that over the years, rodent knows if she has made advancements. Have a blessed day~~

Translate 翻译

Tuesday, 11 November 2014

CHOUX PASTRY - CREAM PUFF


Attempted this pastry a few times many, many years (about a decade?) ago when I had zero knowledge in baking. What I had at that time were dense, hard puffs. I asked my teacher, who held baking classes at her house, how to adjust for softer puffs, she had no idea. At first I thought something was not right about her recipe, so I tried others. They all did not turn out well. I therefore concluded it was my terrible skills and perhaps soft puffs could not be created at home; otherwise how could people sell so well in their shops?! There must be something they added to their pastries to create such softness. There must be some trade secrets..... So I gave up. When cravings kicked in, we only bought durian puffs from our favourite store. No more making them in my own kitchen.

I chanced upon this recipe from Eugenie Kitchen. Her puffs looked so inviting! At first, I interpreted the amount of flour wrongly. Made a test batch, and it turned out hard. You could imagine how disappointed I was. My logical husband suspected the amount of flour was incorrect, so I looked up again. And YES! There was an error in recording the amount of flour on my part. So hopeful I was, I attempted one more time as I still had some durian puree and whipped cream left.
pure durian!
Praise God! Hahahaha! I got it right this time! The cream puff of my so-loved texture is finally here, in my own kitchen! So soft and light.......ahhhhhhh......... (^0^) (^0^) (^0^)
puffed up and very light , THE ONE I've been searching for!


CHOUX PASTRY - CREAM PUFF
Ingredients
114g unsalted butter (I used salted)
240ml water
1 tsp salt (I used 1/2 tsp)
2 tsp granulated sugar
150g plain flour (I used 60g plain flour and 90g cake flour for this batch)
4 eggs

Method
1. Place the first four ingredients into a heavy based pot. Over medium heat, stir and melt butter. Allow mixture to boil lightly. Meanwhile, sift the flour.
2.While the mixture is boiling, quickly pour ALL flour into the pot. (Flour is in cooking process now.) After pouring in flour, immediately remove pot from fire. Stir vigorously with a wooden spoon to make into a ball.
3.Put pot back onto stove. Over low fire, continue stirring until you see a very thin film at the base of pot. Remove pot from fire. Cease fire.
4. Keep stirring for a couple of minutes. Then let pastry cool for about 5 minutes.
5. Lightly beat the eggs in a bowl for about one minute.
6. When the pastry is cooled (it is alright if pastry is slightly warm), add a little beaten egg and stir to combine well. Keep adding a little egg and combining well until all the eggs are used up.
7. You should get a smooth, soft pastry and when you scoop with the spoon and shake the spoon, the pastry should drop.
8. Pipe into a piping bag and pipe out the puffs onto a lined baking tray. Space them apart, they puff up by almost three times.
9. Bake at 200C for about 20 minutes. 
10. Allow puffs to cool completely. Pipe in your preferred chill fillings.

NOTE: You can replace plain flour with all cake flour for a more delicate texture. I used a mix of plain and cake flour as I am piping in thick durian pureed cream. The next time I fill in with mousseline cream or my favourite chantilly cream, I will use cake flour only.
I pressed the cute puffs a little too hard upon filling. CHEERS!

Thursday, 6 November 2014

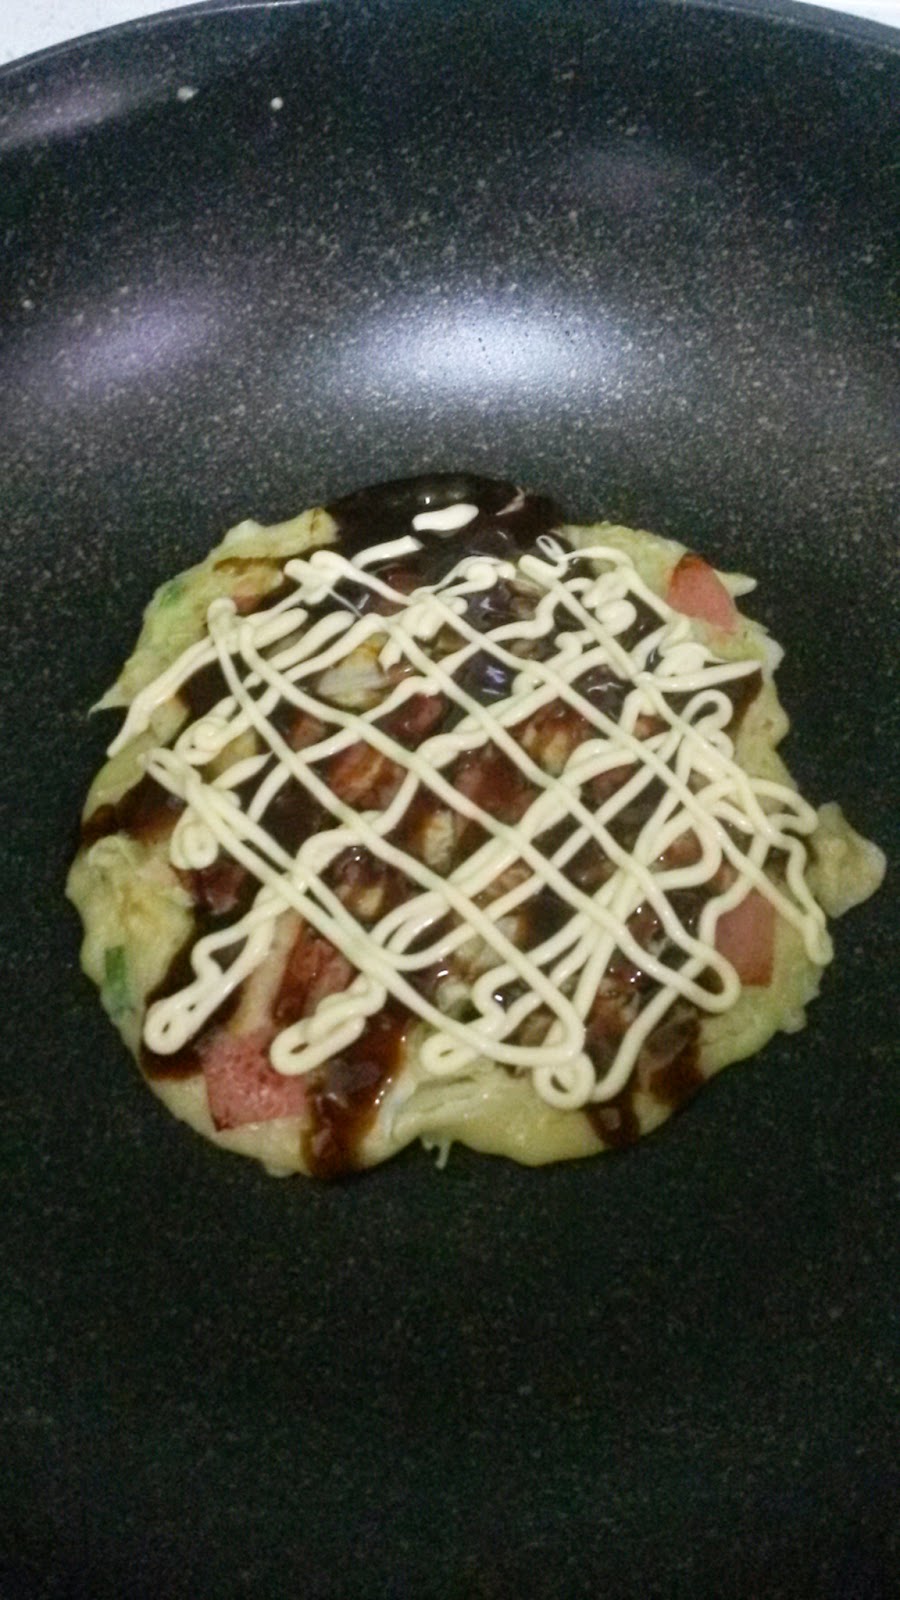
HOMEMADE OKONOMIYAKI

Drool...... as I watched Masterchef Australia S6 preparing sushi. I asked my husband (who was also drooling next to me) if we could have sushi for lunch the next day. Hee hee, he had no chance to object as I quickly made it into a statement, not a question. :p Ladies, this is a good tip! State your requests gently yet firmly and sweetly =)


Since it was Japanese meal day, let me try my hand on the well-loved Japanese pancake, okonomiyaki! To my surprise, it was quite easy to prepare. The only hassle was that I had to prepare one serving at a time, that means standing in front of stove for quite some time. (HOT!)

I had prepared some tomato rice to go along with this. Of course, you can add anything or nothing. It's full of cabbage goodness and very satisfying on its own.


BASIC OKONOMIYAKI
Ingredients (about 5 servings)
2 cups plain flour
2.5 cups water
1/2 stock cube or 1.5 tsp dashi powder
4 eggs
1/4 of cabbage, washed and sliced thinly
2 small onions, diced
3 spring onions, diced
Okonomi sauce or Tonkatsu sauce
Japanese mayo
Shredded Japanese seaweed
Bonito flakes

Toppings (optional) Per serving
1/2 bowl Tomato Rice
1 egg
Ham or Bacon

Methods
1.  Dissolve stock cube into some hot water. In a mixing bowl, combine flour, water and dissolved stock.
2.  Lightly beat eggs and combine into batter. 
3. Bruise the sliced cabbage to soften the leaves. Add in onions, spring onions and lastly cabbage. Stir well.


4. In a non-stick pan, lightly oil pan over medium heat.
5. Scoop a ladle of batter (stir before scooping) and place in hot pan. Quickly shape into an inch thick circle and fry for about 3-4 minutes.

6. If you have toppings, place them on top, beat an egg and pour egg on toppings. Scoop enough batter to cover topping.


7. Carefully flip over the pancake and fry for another 3-4 minutes.
8. Slide onto serving plate, drizzle with sauce, mayo and finally top with bonito flakes and seaweed.


9. Devour time!


Wednesday, 5 November 2014

LINE BAKING TINS


press in corners to make a mark


cut paper till meet the marked corner


For square and rectangular pans


For round pans


This is how I prepare for base of round pan

EASY TOMATO RICE

The other day I saw a video on making tomato rice in an easy way using rice cooker. Today a friend shared the same video to me. Is that a hint? Hmmm.....I'll take it!

EASY TOMATO RICE
Ingredients
2 cups uncooked rice
2 cups water, less 6 tablespoons of water
2 tbsp olive oil or butter
1 large red tomato
1/4 tsp chicken stock powder (optional)
5 slices of ham or bacon, diced (optional)
some black pepper and salt to taste

Method:
1. Wash rice and place the amount of water required. Take out 6 tbsp of water as tomato releases liquid.
2. Stir in oil, salt, pepper, ham and chicken stock powder (if using).
3. Core tomato at the stem and bottom part. Place tomato in the centre.

4. Cook rice as normal.
looks like a large egg without the ham!
 5. When cooked, stir the rice and break up the soft tomato. Combine well.

6. Serve while still warm.

Note:
I will add cabbage the next time because I am using this as topping for our okonomiyaki later on. However, that means to further reduce water when cooking rice.

Other ingredients that I will include as a serving on its own are minced garlic, diced onions, dried herbs.

Saturday, 1 November 2014

LASAGNA


Whenever I dine in pizza restaurants, I am usually inclined to order beef lasagnas. I could not bake my own lasagna in the past without a whole lot of disasters, and all my efforts did not pay off as the end results were disappointing. I did not know there were lasagna sheets that required no cooking before hand. So for years I did not attempt this dish :( ... until I learned that there were such hassle-free lasagna sheets available in supermarkets :) Yea! Now the whole family can eat lasagna for about the same price of one (ok, maybe three) serving we usually pay in restaurants. And I can add as much cheese as I want!
This is the one I am using
There are two main sauces to prepare for lasagnas. One is the meat pasta sauce, and the other is the creamy white sauce. For the meat pasta sauce you can choose to cook from scratch or use bottled pasta sauces. Erm... As I normally cook such dishes on Sundays after church, I do not have enough time to cook from scratch for lunch. A bottled pasta sauce comes in handy in times like these. And today I only have shredded mozzarella and cheddar slices in my fridge (I could not find the mixed shredded cheeses the other day) I just have to do with what I have.
For the creamy sauce, cream is good but fattening. I replace with full cream / UHT milk for a healthier choice. Do not use low-fat or non-fat milk.

LASAGNA
Ingredients
Meat Pasta Sauce
1 medium onion, diced
2 cloves garlic, diced
2 tomatoes, diced
1 tsp dried thyme
1 tsp dried oregano
350g minced meat (beef or pork or chicken)
680g bottled pasta sauce
250ml water
2 tbsp oil

Marinate
1 tsp dried thyme
1 tsp dried oregano
Dash of pepper and salt

Creamy White Sauce
10g butter
1 tbsp plain flour
1/2 cup full cream milk
3/4 cup stock (I used water and added 1/2 stock cube)
Pepper and salt to taste

Instant lasagna sheets
Shredded Mozzarella cheese
Shredded Cheddar cheese (or sliced)

Method
Prepare meat pasta sauce:
1. Marinate minced meat and set aside for 10 minutes.
2. In a hot pan, add oil and fry garlic and onion over low heat, until onion becomes translucent.
3. Over medium heat, add tomatoes and fry till softened. Add dried herbs.
4. Stir in minced meat, break up the pieces and fry till browned.
5. Pour in pasta sauce and water. Stir to combine and let simmer for a few minutes. Turn off the fire.

Prepare creamy white sauce
1. In heavy based pot, melt butter over low heat.
2. Add in flour and whisk till combined.

3. Bring the pot away from stove, pour in milk in a stream and stir as you pour. Keep stirring till mixture is smooth.
4. Bring pot back to stove, turn up heat to medium. Pour in stock and bring to a light boil. Keep stirring until the the mixture is thickened. Add pepper and salt.

Assembly
1. Pour some pasta and white sauces at base of a baking dish. Make sure the sauces cover the surface area of the base.
I lined the baking tray for easy cleaning
2. Lay the lasagna sheet in a single layer.
3. Top with some pasta and white sauces. Make sure all the pasta sheets are well covered.
4. Sprinkle shredded cheeses.
5. Repeat steps 2-4 to reach top of baking dish, ending with the sauces and cheeses. 

I had four layers
 (You must lay enough sauces for every layer, otherwise the pasta sheet may not cook through.)

6. Preheat oven to 200C and bake for 20 min. Let the lasagna rest for another 10 min before serving. Bon appetit!